1. First, I measured my window and how big I wanted the cornice to be. The window is 27.5" wide, and I decided that 16" tall would give me plenty of space to play with. I then traced the measurements onto the foam board, and cut out out the piece with a sharp knife.
2. In order to hang the cornice properly, I measured the middle of the foam and placed an X about 2" from the top. This is where the hanging hardware will go.
3. With a sharp wooden skewer, I made a hole where the X is.
4. Then, with a washer and wire in hand, you can start the hanging hardware. Simply take about 10" of wire and loop in half. Place the washer onto the wire where the loop starts (where the wire crosses). Then, take the the wire ends and wrap around the washer. Pull, the looped end through the hole of the foam board toward the back of the cornice. The washer will prevent the wire from coming out of the foam board.
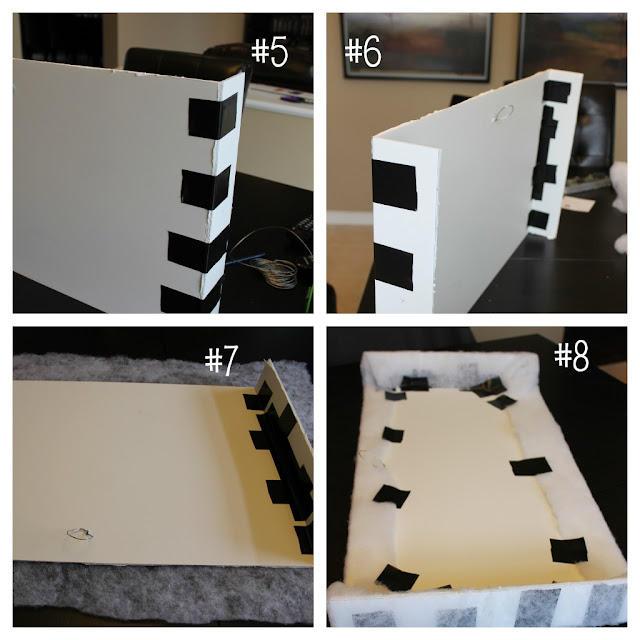
5. Now that you have your main board measured, cut out, and the hanging hardware installed, next you'll need to cut out the side panels. Each side should be 3" deep and the same height as the rest of the board. So, in my case this was 16". After cutting out these two side panels, duct-tape in place so they are secure to the main board.
6. Once both sides are attached to the board, you'll be able to start wrapping the board in batting and fabric.
7. Some tutorials will wrap the foam with the batting and fabric in one step, but I thought it would be easier for me to do this in two separate steps. I first cut out the batting to cover the board easily. Just make sure not to cover the wire with batting.
8. I was using scraps of batting that I had from a previous project, as I didn't have one piece that would cover the whole board. So, I simply duct taped the two together to create one big piece of batting. Then, just wrap the board in batting and duct tape where needed.
9. Here, you'll see how I duct-taped the two pieces of batting together.
10. Once the board is wrapped in batting, you can move onto the fabric. You will follow the same steps of wrapping the board with fabric as you did with the batting.
Once the board is completely wrapped, you are ready to hang it. You can simply use a picture hanger to attach the cornice to the wall. I found that since the cornice sticks out 3" from the wall, that the wire kept falling from the hanger. So by simple bending the hanger around the wire, it will keep the wire in place. It's that easy!
(psst... I'll be giving you a sneak peek of the bathroom on Friday before revealing the whole room next week, so stay tuned!).


No comments:
Post a Comment