Showing posts with label organization. Show all posts

10.26.2012

Organize It: Linen Closet!

Welcome to the final post for "Organize It" week. So far, I've organized the kitchen fridge, laundry room, bathroom cabinets, and front entrance closet. Today, I'll be looking at my linen closet. Unfortunately, I have been "blessed" with a very small linen closet. So, trying to fit all the sheets, towels, blankets, and extra pillows into this narrow space has truely become a challenge. It's a good thing that we have open shelving in our ensuite to alleviate some of the extra towels (you can read more on how I organized those shelves here).

So, let's a little looksy at the current state of affairs in my linen closet...


Not too pretty - I know. All the towels are just shoved in there, and there's really no rhyme or reason to it. So, I decided to go through the closet, and weed through what's taking up all the space. After doing that, I came up with this...


I don't know about you, but I hate (and cannot) fold sheets for the life of me. Well, the flat sheet is easy peesy, but the fitted sheet?! I have no idea where to even start with that. (Sorry Mom - if you're reading this, I guess I didn't pay too much attention all those years when you were trying to teach me how to fold fitted sheets military-style).

So, to fix the issue, I thought about rolling the sheets. What do you think? I'm trying it out for now and see how it goes, but at least these rolled sheets look better than a cascading pile of "folded" sheets.


We had too many beach towels too, and keeping them all in the linen closet posed a bit of an organizational problem. So, I went through them and kept the few that we actually use. When it comes down to it, we don't need more than four beach towels for the two of us.


Do you have a large or small linen closet? How do you store your sheets and towels? Do you roll your sheets, or are you a master at military-style folding?


So, there you have it! "Organize It" week has come to a close. I hope you enjoyed the week, and as usual I love to hear from you - whether comments, advice, or questions - so if you have any spots in your home that could use a little organizing, please let me know. I would be happy to answer any questions or feature a similar space in another "Organize It" week later on.


Have a great weekend!!

10.25.2012

Organize It: Front Closet!

Welcome to Part 4 of my "Organize It" week!  So far, I've organized the kitchen fridge, laundry room, and bathroom cabinets. Today, I'm tackling the front closet. Now, I'm going to be honest here, my front hall closet isn't a huge problem in my home. But, I know that for others, especially those with little ones, the collection of coats, shoes, boots, backpacks, and outdoor accessories can just about drive anyone nuts! For us in my home, the inside of the front hall closet normally has a mountain of shoes and boots in it. And this typically drives me nuts!

So, here's what a little organization can do to this small space...


Inside the closet door, I've installed a metal hook specifically for my dog's leash. This way it won't sit on the floor of the closet, or go missing elsewhere in the house.


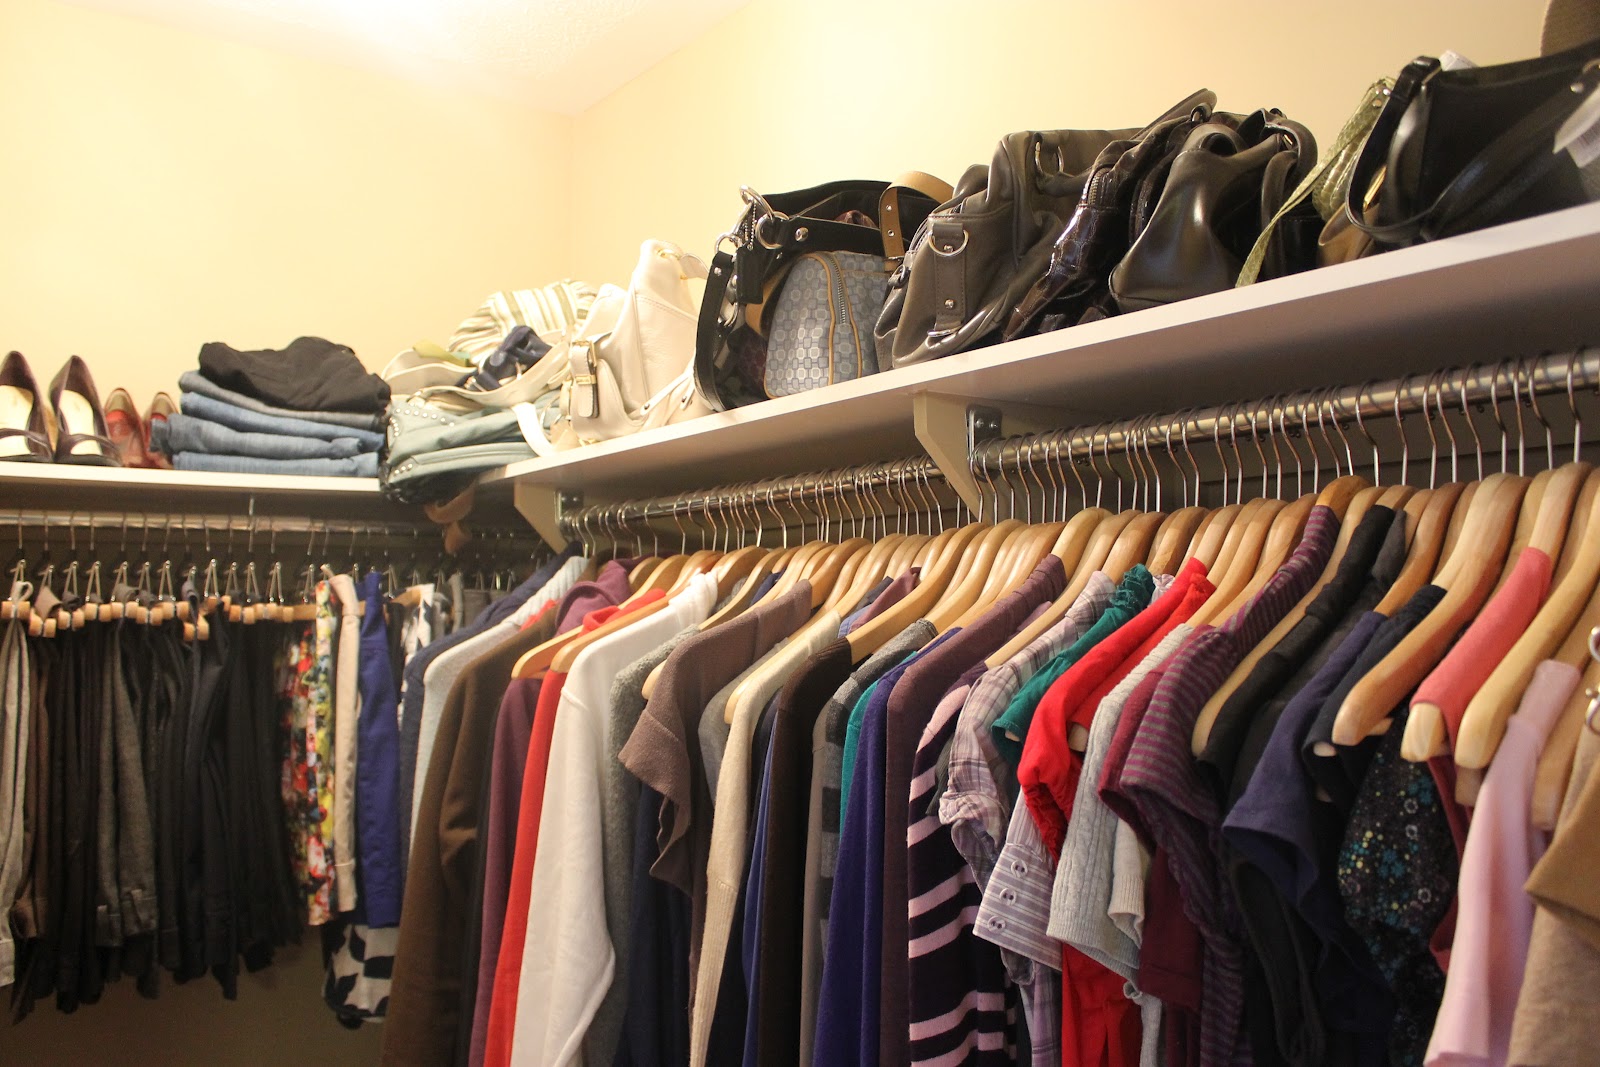
Boots, shoes, and sandals can easily end up in a pile in the front closet. And noone wants to go searching for the shoe mate when you are trying to get out the door. So, a simple wood rack from IKEA and extra space for boots leaves ample storage space for all your footwear. It's also a good idea to keep your current and usual footwear in the front closet, and your extra shoes in another spot in the house (I keep all my other shoes in my walk-in closet, which you can read more about here).


Above the coats, I have two different size wicker baskets that hold outer accessories and other necessities.


The smaller basket holds necessities such as umbrellas, flashlights, and a lint remover. These go-to items can easily get misplaced around the house, and are almost always the thing you are looking for as you are heading out the door for the day.


In the larger of the two baskets, you'll find all outerwear accessories such as winter hats (or toques to my fellow Canadians), mitts (such as my Vancouver 2010 Olympic mitts), and scarves (like my hubby's fleece Ottawa Senators scarf - boo NHL lockout!).


How have you organized your front hall closet? Do you switch it out based on the season, or do you keep everything the same year round?

Tune in tomorrow for the final part of Organize It week where we'll look at the linen closet.


10.24.2012

Organize It: Bathroom Cabinets!

Welcome to Part 3 of "Organize It" week! So far, I've organized the kitchen fridge, and the laundry room. I don't know about you, but for me, my bathroom cabinets are usually in a bit of disarray. There are just too many products to contain in one little space, so the lack of organization tends to get out of hand quickly and often. Today, we're going to look at some storage solutions to keep all of that chaos under control.


You will notice above how crazy the cabinet under the sink in our ensuite bathroom has become. There is little storage space and too many products. So, after weeding through what products I use and don't use - keeping what I use and tossing what I don't, I was left with this...


In our bathroom, we also have a bank of drawers. This is where I store my makeup, hair products, and smaller items that would get lost in the cabinet below the sink. So, to keep all that clutter under wraps, I used small storage containers to organize everything by use and product type.


The other issue in this bathroom, was the bottom drawer that I used for all my hair products. I'm bad when it comes to hair products actually. I tend to buy one, try it out, and if I don't like it, I move onto the next, but I don't throw out the original product. So, I end up with a collection of different products that for the most part, I don't use.


After weeding through my collection, I was left with this... nice and organized!


Do you find your bathroom cabinets hard to keep organized and tidy? Do you have an issue with collecting hair products (or any other products for that matter)?

Tomorrow "Organize It!" will look at the front hall closet... with the cooler weather here, this closet needs some special attention to organize all the extra outerwear.

10.23.2012

Organize It: Laundry Room Storage!

Welcome to part 2 of "Organize It" week! Yesterday, I organized the kitchen fridge, and today I am looking at the storage in our laundry room. Now, keep in mind that this room is on the top of my list to redo, however in the meantime, it needs to be semi-functional and organized.

In our mudroom/laundry room, we installed upper cabinets above the washer and dryer shortly after moving in. Since this room is right off the kitchen and is the passageway from the garage, it was the perfect spot for an extra storage spot for cleaning products, garage bags, etc. The cabinets also needed to house laundry products such as detergent, fabric softener, and stain removers.

Here is how I organized these cabinets:


I bought the woven storage containers from the dollar store and made the tags out of cardstock, scrapbook paper, and ribbon!


We also have a full closet in the mudroom. Eventually, it will be transformed with built-ins for coat storage, hanging space for just-washed clothes that don't go into the dryer, and possibly extra space for pantry items. But, until then, it was a great spot for a few oversized bins to hold extra toilet paper, kleenex, and paper towel (this way I don't have to go all the way into the basement for more, and can just refill these bins as needed).


Do you have cabinets in your laundry room or open shelving? How do you organize this space in your home?

Tomorrow I'll be chatting about organizing the bathroom cabinets and drawers.

10.22.2012

Organize It: Kitchen Fridge!

Welcome to my "Organize It" week here at KM Decor. This week, I am going to look at 5 different areas in my home that I believe to be my biggest organizational problem areas. These areas are always the first to get disorganized. I know that I'm posting about my own disorganized spaces, but you might also have the same issues.

The 5 spaces that I'll be looking at are:

1. Kitchen fridge
2. Coffee cabinet
3. Bathroom cabinets
4. Front hall closet
5. Linen closet

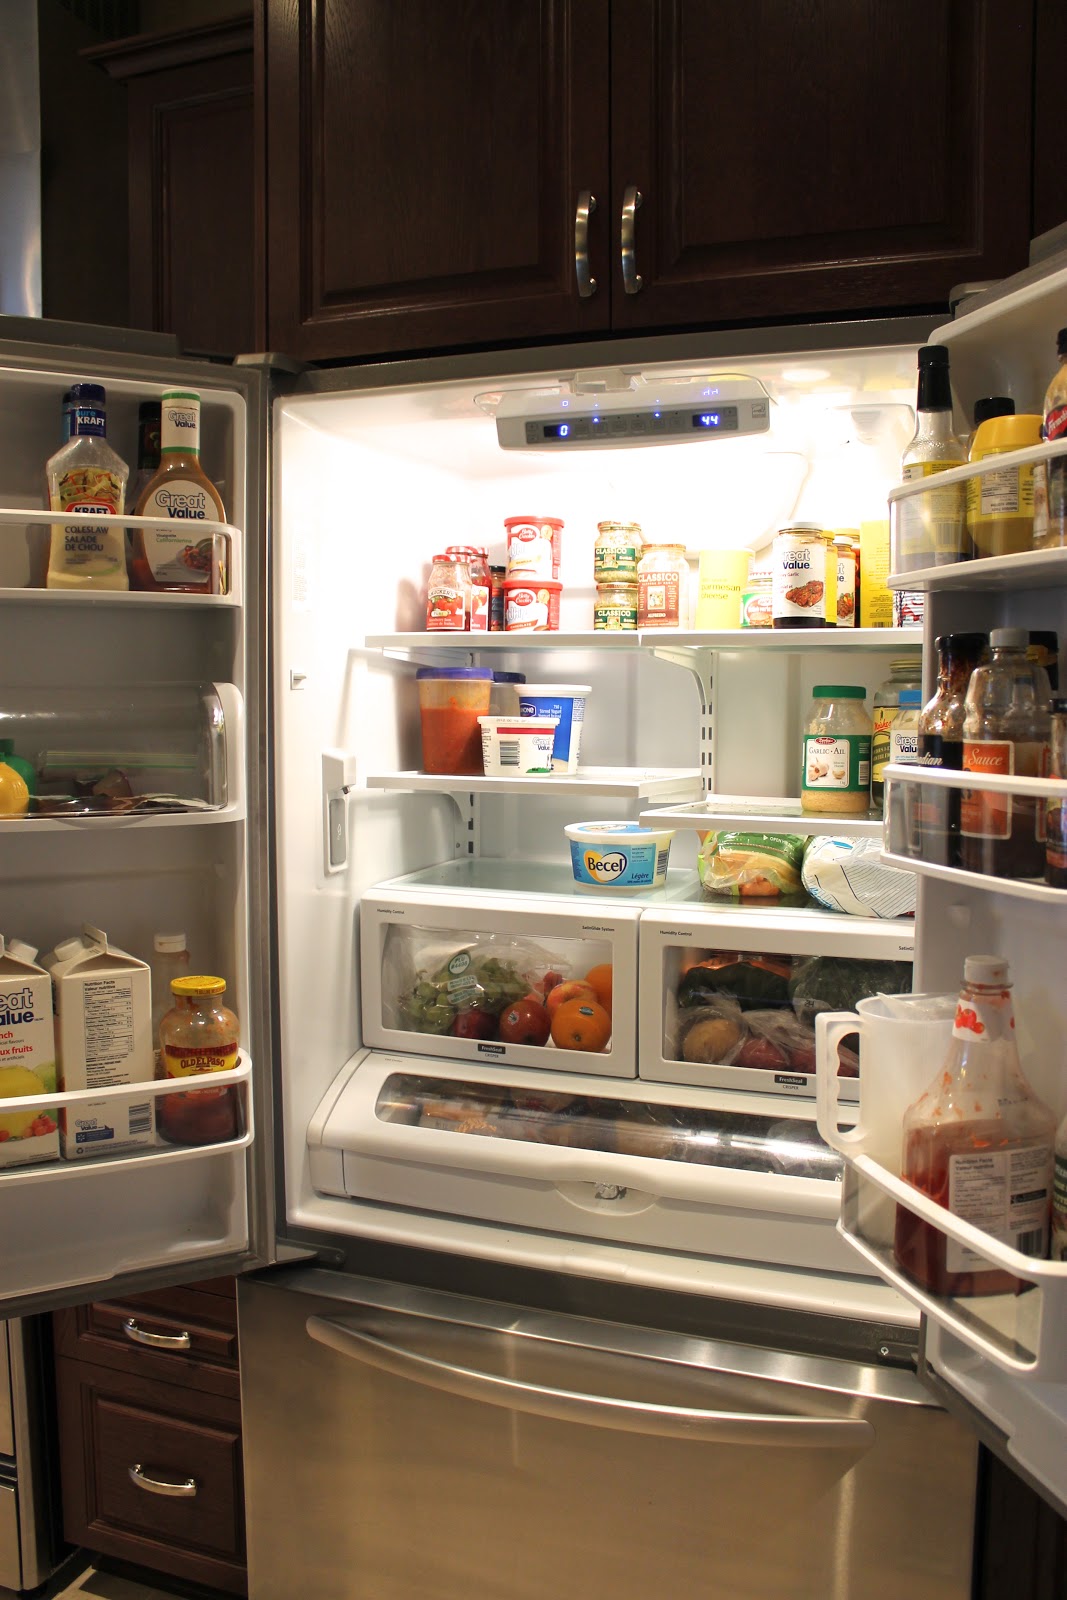
Today, is part 1 and I'll be looking at my kitchen fridge. I'm going to warn you - this isn't pretty. In light of being honest and open on this blog, I'll be showing you the nitty gritty when it comes to these problem areas in my home. So, without further ado, I give you my fridge...


Ugh, I know. Don't say I didn't warn you. I think almost everyone will agree with me that the kitchen fridge is the one place in the house that gets disorganized the quickest, and stays disorganized the longest. Plus, we've all had those moments where we can't quite remember what was in that container, or how long that leftover has been in there.

I think the key to keeping a fridge organized is to really stay on top of what's in there - keeping track of the expiry dates on your food is always key.


I think I need to do some groceries now. And here's what was removed from the fridge...


The best way to keep on top of it, is to clean the fridge weekly. The night before your garbage collection (or green bin for your compostable items, if you're in the Ottawa-area), go through your fridge and get rid of all expired foods.


What's great about going through the fridge on a weekly basis, is that it will help with your grocery list. You'll know exactly what you have and what you need in time for your weekly shopping trip.

It also doesn't help that today's fridges are deeper and taller, so organizing your food can be a daily struggle. Best way around this is to group like-items together - ie: salad dressings, condiments, breads, cheeses, meats, etc. This way, when you're looking for something in particular, you have but one place to go.


How do you keep your fridge organized? And have you seen those new fridge coasters? If not, you can check them out here. It makes for a clever (and pretty) way of organizing your fridge.

Stay tuned tomorrow for organizing the laundry room storage.

10.19.2012

Organize It Week!

Interior decorating isn't always about the pretty details, that great piece of furniture, or those fun throw pillows. In fact, putting the time into decorating a room when the foundation is disorganized is like a gorgeous wedding cake that tastes terrible. So, I decided to dedicate an entire week (starting next week) to home organization. I know, or at least I think I know, that the majority of you guys have the same problem areas as I do around my house. These are the areas that no matter what, you have a hard time keeping organized or at the very least, tidy. I've narrowed these down to 5 areas and I'll tackle a different one per day.


The areas that I'll be organizing are:


1. Kitchen fridge (Monday)
2. Laundry room storage (Tuesday)
3. Bathroom cabinets (Wednesday)
4. Front hall closet (Thursday)
5. Linen closet (Friday)


So, please tune in on Monday for the beginning of Organize It Week! (And as always, I appreciate your questions and comments - if you have any other organizational problem areas in your house, I would love to hear about them, and can incorporate them into a later post).

9.11.2012

Pantry Party: Tips On Organizing Your Pantry

Ok, let's be frank. I am a bit of an organization nut. Well, that's not entirely accurate. I'm a neurotic nut who's obsessed with organization. For anybody that knows me (and for those just starting to get to know me), I have a way of doing things around my house. It could be (1) the angle of a picture frame on a table, (2) the way I load the dishwasher, or (3) the need to have everything in it's place. Alright, #1 probably sounds weird to most people but in my neurotic mind, it makes perfect sense - sometimes the angle of a picture frame is just all kinds of wrong; #2 is (I believe) pretty common, and #3 just makes downright good sense.

So on that note, I would like to introduce you to my pantry...


It's not a big space by any means, but it does the trick. In our last home, we weren't blessed with a bonafide pantry - our food was scattered across 6 cabinets and in the basement on a storage unit. Not good when you are trying to make a grocery list and you don't know what you have (this can lead to buying another 20lb bag of flour when you already have about 18lbs at home - believe me, this happens). So that being said, an organized pantry is key to cooking, grocery shopping, avoiding debt for excessive flour purchases, and maintaining sanity.

Here are a few key tidbits of advice that I can bestow when it comes to organizing the chaos that can become of your pantry:

1. Have a place for everything and stick to it. No matter what.

I get it. I really do. Keeping an organized pantry can be tricky. Especially when your husband (or kids) puts things where they should not go. But, making sure that everything in that cupboard has a place to go, will save you time, energy, and nagging in the future. There is no right or wrong way when it comes to deciding what should go on which shelf. This is entirely based on how you function as a chef and a grocery shopper. For me, I work from most used to least used items (top to bottom). My pantry is 24" deep so finding things at the back is problematic. But, keeping the most commonly used items at eye-level makes the process a heck of a lot easier. I do keep the junk food near the bottom (eventhough I tend to explore that shelf more than I should, I would hate to see what would happen to my waistline if I moved this shelf to eye-level). For those with kids, I am sure you're screaming at me right now - putting junk food near the bottom is spelling out disaster. But like I said, to each their own. I don't have kids, so I'm putting my chips far from where my eyes can see.

2. Organize shelves by meal type.

Picture this - it's a Monday night, you're stressed from a long day at work, your husband (or kids) are starving and cranky, and you need to get dinner on the table in a hurry. So, you open your pantry only to find pasta next to the peanut butter, and the tomato sauce has gone MIA. Organizing your pantry based on a meal type will save you a lot of time and energy. Plus, you won't have to think up new recipes such as peanut butter penne (I think the whole family will thank you for that).

I organize my pantry based on these core elements: (1) pasta and rice; (2) canned goods and ingredients for dinners; (3) baking supplies; (4) snack foods; and (5) dog food (yup, my dog Aspen gets a shelf to herself. Ok, she shares it with the aluminum foil and plastic wrap).


3. Swap out packages of dry goods for stackable air-tight containers.

If your pantry (baking shelf in particular) looks like a package graveyards, you aren't the only one. What I have done for years, and really makes a difference for me, is to get rid of these various packages and swap out for clear storage containers. I buy Glad containers from Walmart. They are inexpensive, durable, and stackable. Buy them in different sizes to accomodate whatever it is that you need to store. Then, add a label and you're good to bake. Plus, when it comes to storing baking supplies, keeping an air-tight seal is key to cookie-making success.


4. Save time and money by making your own spice jars.

If there is only one piece of advice that you take away from this post, let it be this: buying spices at the grocery store is a rip-off. Period. They will charge you approximately $4.99 for a small jar of cinnamon, garlic powder, or what have you. It really doesn't matter what it's in the jar, because it's just the jar that you're paying for. 

I shop at my local Bulk Barn to stock up on my spices. Not only do they have a selection of spices that would rival any Moroccan market, but a generous amount of any spice runs pennies to a few dollars (I'm sure on one trip of mine, a refill of the spice I needed cost me $0.45! You can't beat that!) Once I have completed my spice voyage, I stop at the Dollarama where you can buy spice jars at 3 for $1! Add a label and start cooking.


5. Baskets are your friend, so be friendly!

Most of us have spice packets, food samples, remnants of holiday sprinkles, and boxes of granola bars etc lounging around our pantries with no place to call home. This is where baskets become extra handy. They are perfect to store all those aimless wanderers and clear up the clutter. Baskets are also great to keep your onions and potatoes fresh (since both of these shouldn't live in your fridge). And nothing makes a space look more organized than a basket.

Have any of you struggled with organizing a pantry? Do you have any tips on making use of a small space for food storage? Or does your furry friend get a shelf all their own in your pantry?

9.10.2012

DIY: Organizing Open Shelving in a Bathroom

Our ensuite bathroom isn't overly large, but it suits our needs just fine (you'll see the ensuite in our home tour which will be posted shortly). We would have loved to have a double vanity, but unfortunately the builder didn't include that as an option. So, with a single vanity came double doors and a bank of drawers, which we added as an upgrade. Overall, we aren't lacking storage in this bathroom, but the builder did include open shelving behind the door and beside the shower. When we first moved in, I was puzzled on how to make open shelving functional and beautiful at the same time.

So, this is what I came up with...


I decided that a good balance of decorative accessories and storage baskets would be best to make the open shelving useful, but still appealing.  The storage baskets hold toilet paper, bath products, and candles and aromatherapy products.


I also added a few candles - both votive holders and a chunky pillar candle (the river rocks we bought for the vases we made for the table centrepieces for our wedding). 


I also wanted a personal touch - and nothing is more personal than a picture of my husband and I on our wedding day. (And believe it or not, I admire this picture everytime I'm in the bathroom). Sometimes adding a framed photograph to an unexpected place like a bathroom really makes the room more personal. And, really, the bathroom is the most personal room in the home. 


We do have a linen closet in the upper hallway, but the open shelving in our ensuite bathroom leaves plenty of room for extra towels and facecloths. Plus, it's great to have these close at hand. I like the idea of rolling the bath towels and folding the facecloths and hand towels. 


There is still lots to do in this ensuite bathroom. Actually, we've barely done anything to this room, other than hanging some art and organizing the bathroom products. Ok, that's not entirely true - we also ripped out the laminate countertop, builder-grade sink and faucet, and replaced them with a granite countertop, an undermount sink, and a widespread faucet. Oh, and upgraded the light fixture. But, we are planning on painting over the builder-beige walls, maybe adding a wall treatment, and I would love to transform these plain white MDF shelves to thicker dark-stained shelves (I hate that you can see the brackets for each shelf). But, for the time being, this works for us.

Do any of you have open shelving in your home? Or have you included a personal touch in your bathrooms?

8.28.2012

DIY: Home Office Closet Organization

When we moved into our new home last fall, our home office became a dumping ground for papers, files, and stuff that didn't have a place. Scratch that. I'm lying. This problem stems back to our first home - the office was disorganized then too. I hope I'm not the only one who seems to have this issue.

The coffee table in this room became the stomping ground for paperwork, stuff that needed to be taken care of, and filing. For your own benefit, I didn't take a before shot. Trust me, you'll thank me. Basically, this table was littered with clutter. And although I walked by it everyday and said to myself that I really needed to deal with it, I didn't. I put it off to another day.

Well, that other day came and I decided it needed to be taken care of. No, that's a lie too. I was forced into dealing with it - my brother-in-law and his girlfriend recently moved in with us until their new home would be ready this fall. This room would become their "living room" since there is a couch in here and plenty of room. But, the chaos that this table had become needed to be taken care of before they moved in. And to save my sanity. Even just a little bit.

The main problem we were facing was storage - the lack of storage. We have a desk with no drawers and two Ikea Billy bookcases. The bookcases helped with some of the clutter, but not all of it. After organizing the bookcases, we were left with office and art supplies, scrapbooking stuff, fabric samples, ribbon, filing - you get the idea.

The solution was to redo the closet in the home office with built-in shelving. But, we didn't want it to be a permanent change since we may need to use this closet for clothes storage at some point in the future.

Here is a look at the under-utilized closet before (yup, it's pretty much empty):


And here is the AFTER:


First, we removed the two small rods to make way for the shelving units. The shelving units we found at Canadian Tire for less than $40 each. They are far from fancy, but they do the trick. And when the time may come when we need to convert this closet back for clothes storage, we can easily use these shelving units in the basement or garage, and simply reinstall the rods.

Once the shelving units were installed, it was just a matter of figuring out what needed a place and how I was going to organize it. The storage boxes are all from IKEA. I bought varying sizes to accommodate anything and everything that I have, plus room to grow. I also decided to give the storage box labels more personality by using scrapbook paper rather than the plain white labels that come with.


The left side of the storage unit houses my 3-hole punch, paper cutter, camera (and bag), and my filing box (for household bills, house documents, etc).


Storing printer paper can become messy since it needs to stay in a proper place to not be damaged. So, I decided to put my paper - printer paper, lined and holed paper, and legal-size cardstock (for design boards) - in a tiered organizer that I got from IKEA.


The right side of the unit holds a variety of storage boxes for markers, ribbon, scrapbooking accessories, and fabric samples.


It really is that simple. Now we have loads of storage space in a previously unused closet. Easy peasy.

(You'll get to see more of our home office as I slowly redo it).

8.14.2012

Master Closet Reveal

Last week, I posted about closet inspiration while I was designing my walk-in closet makeover. And today, I will reveal to you all the hard work that my husband put into making my design a reality.

Let's look back at what I was dealing with...


And as you can see, there is very little storage space. The builder installed an L-shaped rod for hanging space, and one L-shaped shelf. This allowed for little space for folded clothes. Plus my shoes and purses would be either scattered on the floor or shoved on the shelf. Not practical when you are trying to pull together an outfit.

And, here is the AFTER...


When designing this closet, I decided on floor-to-ceiling storage. Since it isn't a very large space, I wanted to use every square inch of it to maximize storage - not only for what I already owned, but to allow room for what I haven't bought yet.

In order to do this, I included the following in my design:

  • A wall of double hung rods for plenty of hanging space for tops and bottoms. 
  • Another rod hung slightly higher to give plenty of room for dresses and long skirts.
  • A space dedication specifically for shoes (ie: a wall of shelving on one side)
  • Shelves for folded clothes and other small accessories (such as hats, pashminas, sunglasses etc).
  • And lastly, I needed a spot for purses.

We also decided to paint the closet white to make the space appear brighter, and then we added dark chocolate shelving for contrast.

The corner shelf offers plenty of space for folded jeans, hoodies, and extra accessories.


The shoe shelf offers storage for about 50 pairs of shoes. I also chose to make the shelves at various heights to allow for plenty of room for heels and flats which maximizes the storage space. 


I also decided to run a shelf around the top perimeter of the closet (including over the door) to allow for storage of purses, extra shoes, and off-season wear.


I now have oodles of storage space, plus tons of room to grow too. I got each of the requirements off my list, and I couldn't be happier with the results. And I'm especially grateful that I have such a wonderful husband that would put in so much time of his vacation to build me this beautiful closet!

Related Posts Plugin for WordPress, Blogger...